Preparing presentations for class projects is a good time to start employing professional best practices for finding and using images. This tutorial provides an introduction to the importance of crediting creators, licensing, finding images, and writing an image credit.
Crediting Creators
Just because an image is on the internet does not mean it is available for you to use. When an image is created by someone, they own the copyright (with some exceptions). If I want to use that image, I need to ask permission. One tool that makes it easy for creators to grant permission, or license, is Creative Commons.
Creative Commons
Creative Commons is a way for a copyright holder to grant permission when they share their work. Each Creative Commons license has a different set of rules about how the work can be used, detailed on the Creative Commons About CC Licenses page.
This video from Creative Commons talks a more about why this licensing is so important for people who share—and borrow—work on the internet.
Finding Images
There are a number of ways to locate images for your slides. However you look for images, be sure to keep track of information for credit and attribution. Below are some search tools to help.
CC Search
CC Search is Creative Commons’ search engine. It searches the assets from a few dozen image sites but you will need to verify the license of an image found in the search results.
Wikimedia Commons
Wikimedia Commons hosts work that copyright holders put into the public domain. You will still need to verify the license of an image you locate.
flickr
flickr is a photo management site. Photographers can store, share, and sell images.
Google Image search
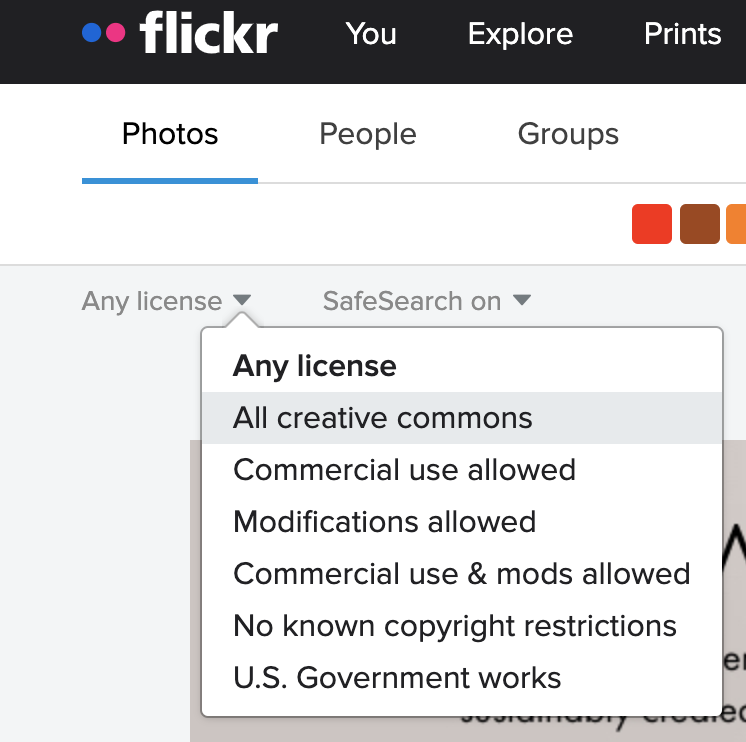
Google Image is a popular search tool. You can filter results by license. The license choices are limited, so take care in making sure the image license is appropriate.

Writing an Image Credit
After you place the image in your slides, add the image credit. Use Creative Commons Attribution best practices to collect and format the necessary credit elements. The video below walks you through the process.
Find licensing information
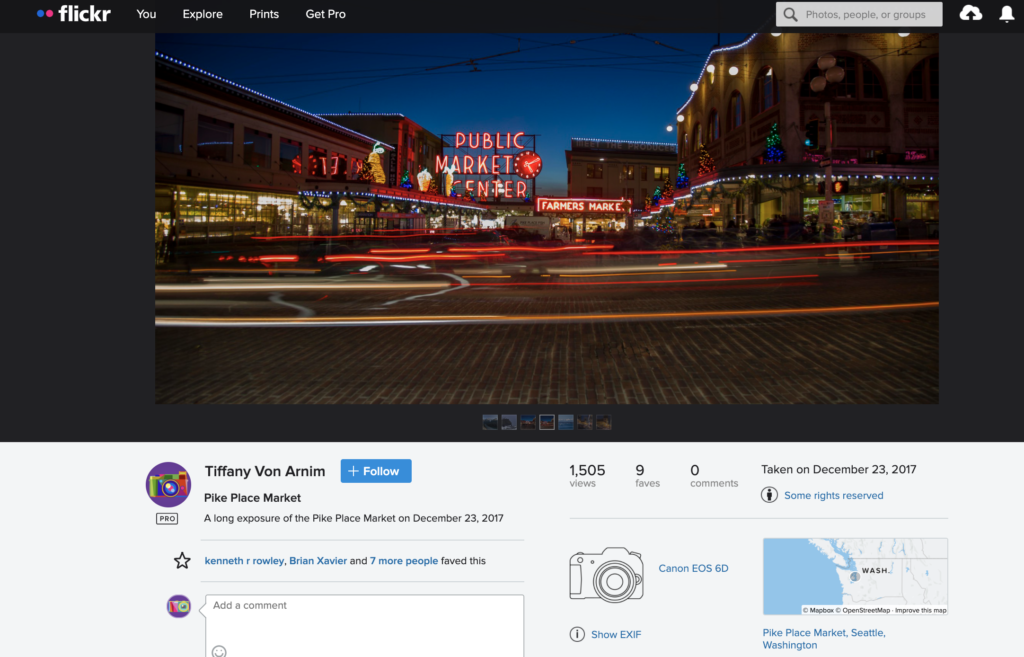
On the detail page of this image is the photographer’s name and other details of the image. The license information is indicated by the Creative Commons icon and the hyperlinked text that reads “Some rights reserved.”

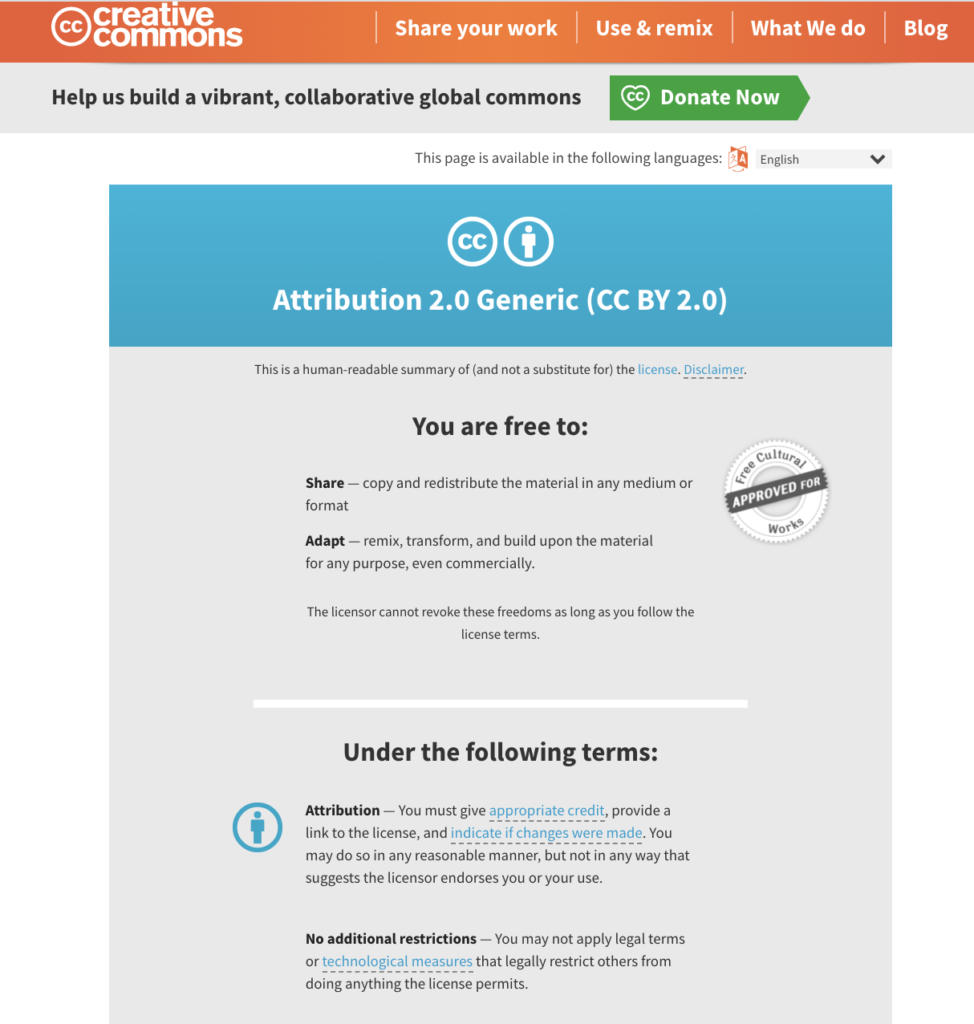
Click either the icon or the text, and a new tab opens with the license information.
Verify licensing information
Locate image details
The image credit should include the title of the work, the creator, the source, and the license. Let’s look at our image detail screen again to see where the information is located.
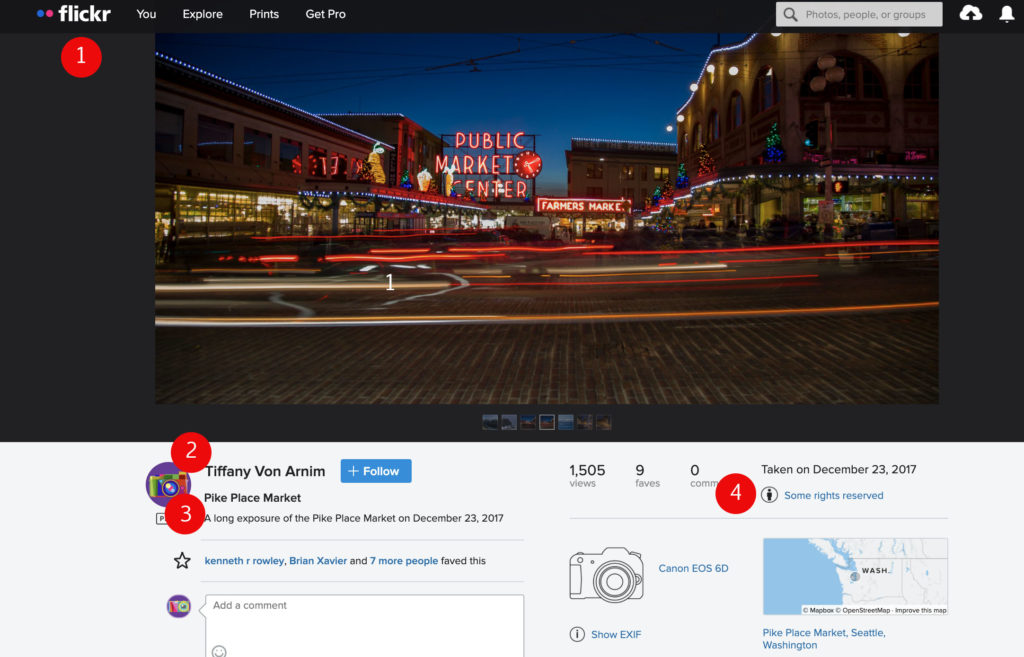
For the image from flickr, above, we see the title of the image is (3) Pike Place Market. The photographer’s name is (2) Tiffany Von Arnim. We got the image from (1) flickr. The license is called (4) CC BY 2.0.
Attribution of this image online will include hyperlinks:
Pike Place Market [link to photo] by Tiffany Von Arnim [link to user profile] via flickr is licensed under CC BY 2.0 [link to license page].
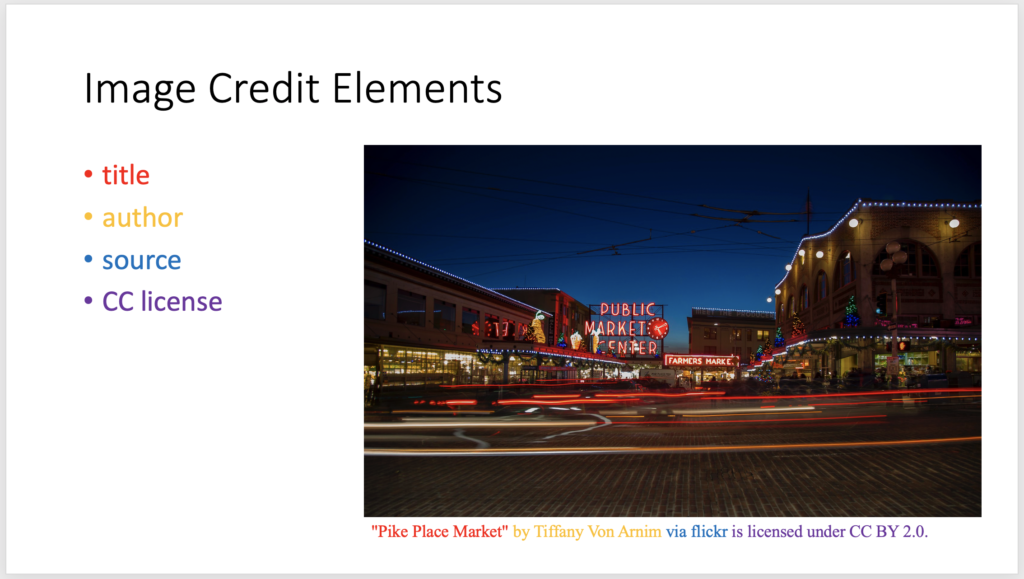
Image credits online allow you to link back to the creator or the license. Since the audience cannot click these links during your presentation, your credit will appear as text only. Attribution on a slide would be:
“Pike Place Market” by Tiffany Von Arnim via flickr is licensed under CC BY 2.0.
Add it as a caption or text box so it looks like this:
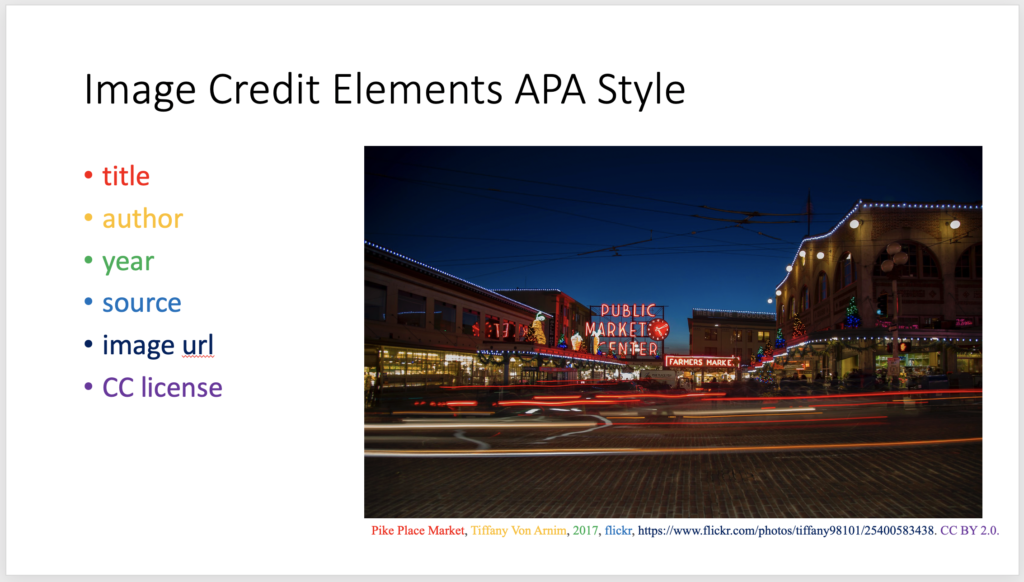
As always, if your instructor has a different standard, be sure to follow their instructions. For example, using APA Style or MLA Style requires the year in the credit. The APA Style image credit is:
Pike Place Market, by Tiffany Van Arnim, 2017, flickr https://www.flickr.com/photos/tiffany98101/25400583438. CC BY 2.0.
Add it as a caption to look like this:
